


A Triumvirate of Painful Things
A broken rib, fine weather, seed sowing basics and a spinach soup recipe

I broke a rib on a family ski holiday in Italy some weeks back so it’s been a slow and frustrating time since, with basic movements causing much agonised flinching, huffing and puffing and trying desperately and at all costs to avoid the Triumvirate of Painful Things - namely the acts of laughing, coughing and sneezing. Ah… I used to love the catharsis of a good sneeze. Not any more.
Now I would like to tell you that it was a dramatic Bond-esque off-piste manoeuvre that led to said injury, but in fact it was far more pedestrian and boring - I was more or less on the flat skiing along and I think I must have hit a hard piece of ice or crossed my skis at the back, and next thing I knew I spun around, landed on my chest bone on a hard piece of ice and cracked my 4th rib. So, what should have been just a quick, one week absence from the veg patch (with a neighbour watering seedlings and minding hens for me) has turned in to a more prolonged absence from GIYing and from writing this column.
For now, the working assumption is that a broken rib will heal relatively quickly and that all will be well in say 4-6 weeks, and that wouldn’t be too bad. But of course at this time of the year, there’s much to do and a real risk (horror of horrors!) of falling permanently behind for the season. So as I lay prone at night trying to get comfortable, mainly what was on my mind was the seedlings in the glasshouse, and how they could get pot-bound if I don’t transplant them. Which let’s be honest wouldn’t be a big deal with say a tray of lettuce seedlings, but it would be VERY SERIOUS INDEED with the tomato plants (all 80 of them). Given that I can’t so much as lift a watering can right now, yesterday, I commandeered Eldest Boy instead and headed down to the glasshouse to get some much needed work done by proxy - with much pointing, ordering, cajoling, suggesting, muttering.

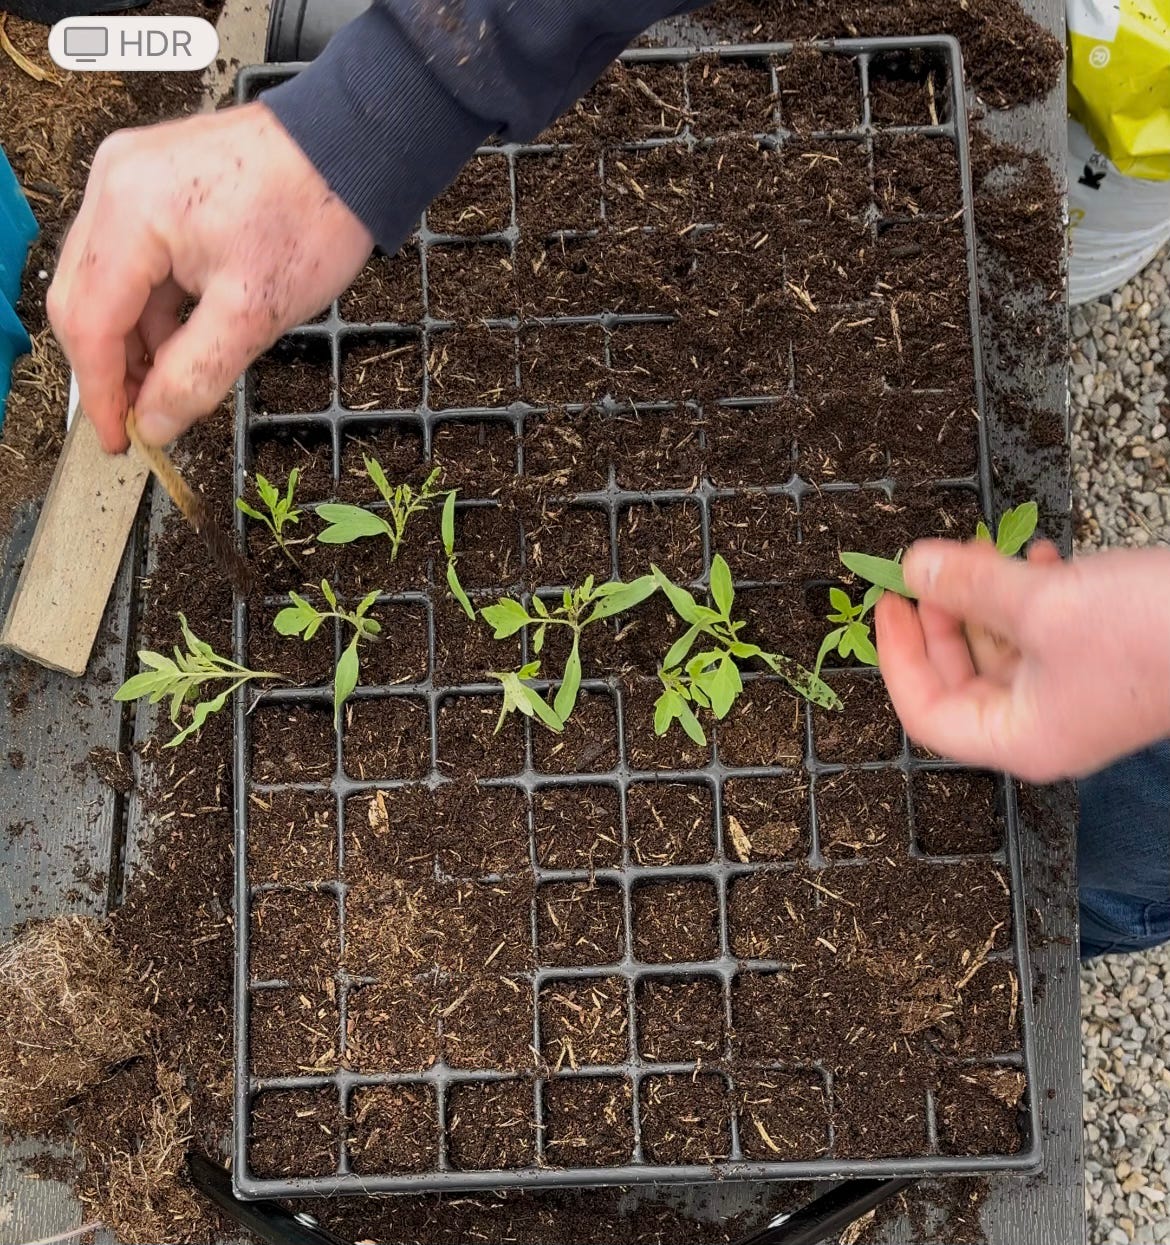
The tomatoes were sown about a month ago in little pots (10 seeds in each pot) and they’ve done well. At this juncture the job is to transplant the whole lot in to one large module tray where they will spend the next month growing further before being planted out in the tunnel. You might ask why I don’t sow them in the module tray to start and it would be a good question, but I find a reset with fresh compost at this stage seems to help with growth and safeguards things if I have to hold them for a few extra weeks if the weather doesn’t play ball at planting-out time. Besides, transplanting seedlings is a fun activity - or at least it usually is but maybe not so much with a broken rib. Eldest Boy did the lugging of compost and filling of trays etc, and we did the transplanting together, easing out the little seedlings from their pots (holding gently by the stem, not the leaves or roots which could damage easily) and then firming them in to the compost in the module tray. Under gentle direction (!) he also transplanted the aubergines in the same way, and some lettuce and climbing French Beans in to the soil in the polytunnel. With those jobs done I am feeling a little more on top of things for now.
Today, assuming Eldest Boy’s patience can be relied on, I am hoping to plant out potatoes (which should really have been done 2 weeks ago - though I do have a small batch sown in the tunnel as written about some weeks back).
A Fine Spring
Speaking at the Good Food Ireland conference in Dublin last week, I got to catch up with lots of folk including some commercial growers and farmers, all of whom had a spring in their step thanks to the fine weather we’ve enjoyed in March. After a long winter which had a difficult storm at its tale end in Feb, and after two consecutive wet springs in the last two years, this is hugely welcome particularly for our veg growers who have endured a torrid time of it on all fronts - increasing costs, the vagaries of climate change and a retail/consumer landscape that scarcely values their produce. (On which point you can listen here to a discussion I contributed to with Bobby Kerr on Newstalk about the landscape for veg growing in Ireland with Tom Keogh from Keoghs Crisps and fruit grower Eamon Crean.). It’s amazing what a month of fine weather can do for the soul and the humour, and farmers I spoke to were certainly chipper, though also cautious and loathe to jinx it. Long may it continue.
There’s certainly a feeling that nature is in full on growth mode now. Leeks, kale and sprouting broccoli are running to seed in the veg patch (a good sign that there’s growth afoot), and the weeds are starting to grow, particularly in the Polytunnels. There are new season leaves to harvest - oriental greens in the tunnel, mint in pots on the deck, nettle leaves in the hedgerow. As I write this I have the door to the garden open, and it’s a spectacularly gorgeous day - sunny and warm with plenty of birdsong. The garden calls me.
Much work to do.. Eldest Boy will be busy 😊.
Seed Sowing Basics
When you start growing your own food , it can seem like there is a whole eco-system of incomprehensible activities, tasks, timings and terms that all have to be known in order to do it successfully. There seems to be so much to learn. But actually, it’s more accurate I think to view it as a small set of ‘master skills’, which if you can get on top of, you have around 80% of the learning done.
Seed sowing is probably the most important of all those master skills. On our courses online and at GROW HQ, we spend a lot of time on seed sowing because it’s critically important to the whole enterprise and once you’ve seen it done right and practised it yourself, it’s a skill you’ll have forever.
It seems an opportune time to write about it too since we’re in peak seed sowing time now. Although some seeds are best started off in pots (tomatoes, aubergines, celery), the majority of my seed sowing is done in module trays. A module tray is a tray with individual compartments or modules in it. A decent sized tray will measure 335 x 515mm and have between 80 and 150 modules in it. The best ones are made from rigid plastic so they can be used again and again (avoid the cheap plastic ones that you get bedding plants in that often break after a single use). I have five of them, which I’ve had forever. The beauty of a module tray is that the roots of seedlings are kept apart which means you don’t upset them when you are transplanting them.
Before you fill the tray with compost, it’s important to work with the compost a little first. Break up any larger clumps – this is important because smaller seeds might fall down through the cracks and fail to germinate because they’re too deep in the compost. I start by completely overfilling the tray with compost and working it into the modules with my hands. Banging the tray against the bench a few times will help the compost to settle down into the container. Overfill it again. Then, I use a flat stick or piece of timber to ‘slice’ the excess compost off the top of the tray, leaving a flat, clean surface on the module tray.
Before sowing the seeds I make a ‘divot’ in each module with my fingers. This is the little recess in the compost in to which you will drop the seed (I usually use two fingers from each hand to do four modules at a time to speed things up!). How deep you make the divot depends on how deep the seeds need to be. A good rule of thumb is that you sow the seed roughly twice as deep as the seed’s size. So, a tiny lettuce seed is almost on top of the surface, while a larger seed like a squash or pumpkin would be much deeper.

Depending on the size of the seed, you can either pick one up and drop it into the divot; or use a plant label to move it off the palm of your hand and let it fall into the divot. With most vegetables, you will be sowing one seed per module but with others (e.g. leeks) you might be sowing 3-4 seeds per module. It’s really important to label the tray. I use white plastic labels and a pencil so they can be washed off and reused.
I always write the name of the veg, the variety and the date it was sown on the label, so for example “Beetroot, Detroit Globe, 28/03”. That way if germination is slow you can check how long it was since it was sown.
To cover the seeds, I then overfill the tray with compost again and slice the excess off with my trusty stick to leave a flat surface again. Next, I bring the trays outside and water them on the ground outside the potting shed. I use a fine mist setting on the hose, but a fine rose on a watering can is just as good.
Check out the videos in the Resources section of giy.ie to see the seed sowing in action.
Recipe of the Week – Spinach Soup with Wild Garlic Toasts
Our perpetual spinach is still doing well in the tunnel and has started producing new leaves in the last few weeks. Here a bowl of spinach soup and a crusty bread roll get a glamorous makeover with this vibrant dish from Adam Gray. Wild garlic is easily foraged. It has long green leaves and a distinctive garlicky smell, and as in this recipe, it can be cooked or used raw in salads or as a garnish.
Ingredients:
Spinach soup:
50g of butter
250g of shallots, finely sliced
200g of potato, finely sliced
1.75kg spinach leaves
50g of wild garlic leaves
1.75l vegetable stock
salt, pepper
Wild garlic cheese toasts
200g of cream cheese
15g of wild garlic leaves, raw and finely chopped
1 egg yolk
8 bread rolls (or blaas!)
olive oil
Directions:
For the Spinach soup, melt the butter in a heavy-based pan. Add the shallots and potatoes. Sweat with no colour until the vegetables start to soften. In another pan, bring the vegetable stock to the boil and remove from the heat.
Add the picked, pre-washed spinach and wild garlic leaves. Sweat for a further minute only and remove from the heat.
Add the boiling stock and blend until smooth immediately to retain the fresh, green colour. Pass through a fine sieve into a bowl over ice.
This is done to cool the soup quickly to stop browning. Season to taste with salt and pepper.
For the wild garlic cheese toasts, divide the egg yolk in half, discarding one half.
Mix all the ingredients together except the bread rolls and olive oil, seasoning with the salt and pepper to taste.
Slice the top and bottom off the rolls and then cut in half.
Spread 2-3mm of the cheese mixture on one side of one half of the roll, evenly. Place the other half on top, making a sandwich. Repeat with the rest of the rolls.
Place in the fridge for 10-15 minutes to set. Heat a generous amount of olive oil in a frying pan and fry the rolls on both sides until golden brown.
Serve the spinach soup with the wild garlic cheese toasts on the side.
Michael Kelly is an author, broadcaster and founder of GIY.
Lucky Eldest Boy, Mick, getting so much sage counsel and mentorship. I’m sure he’s soaking it all up, along with the muttering… 🤣 Brings back great memories working alongside my mother in our large vegetable patch planted to feed our family of 8… no shortage of muttering on the part of the Youngest Boy… 🤣 Thanks for the tips and laughs!
Another great post full of information and a good soup recipe. Sorry about the rib. I’m not sure that I broke, but severely bruised a rib after a fall in a street in Surbiton several years ago, breathing was difficult and wearing a bra made it even worse, lucky you, not something you would need to contend with 😂